
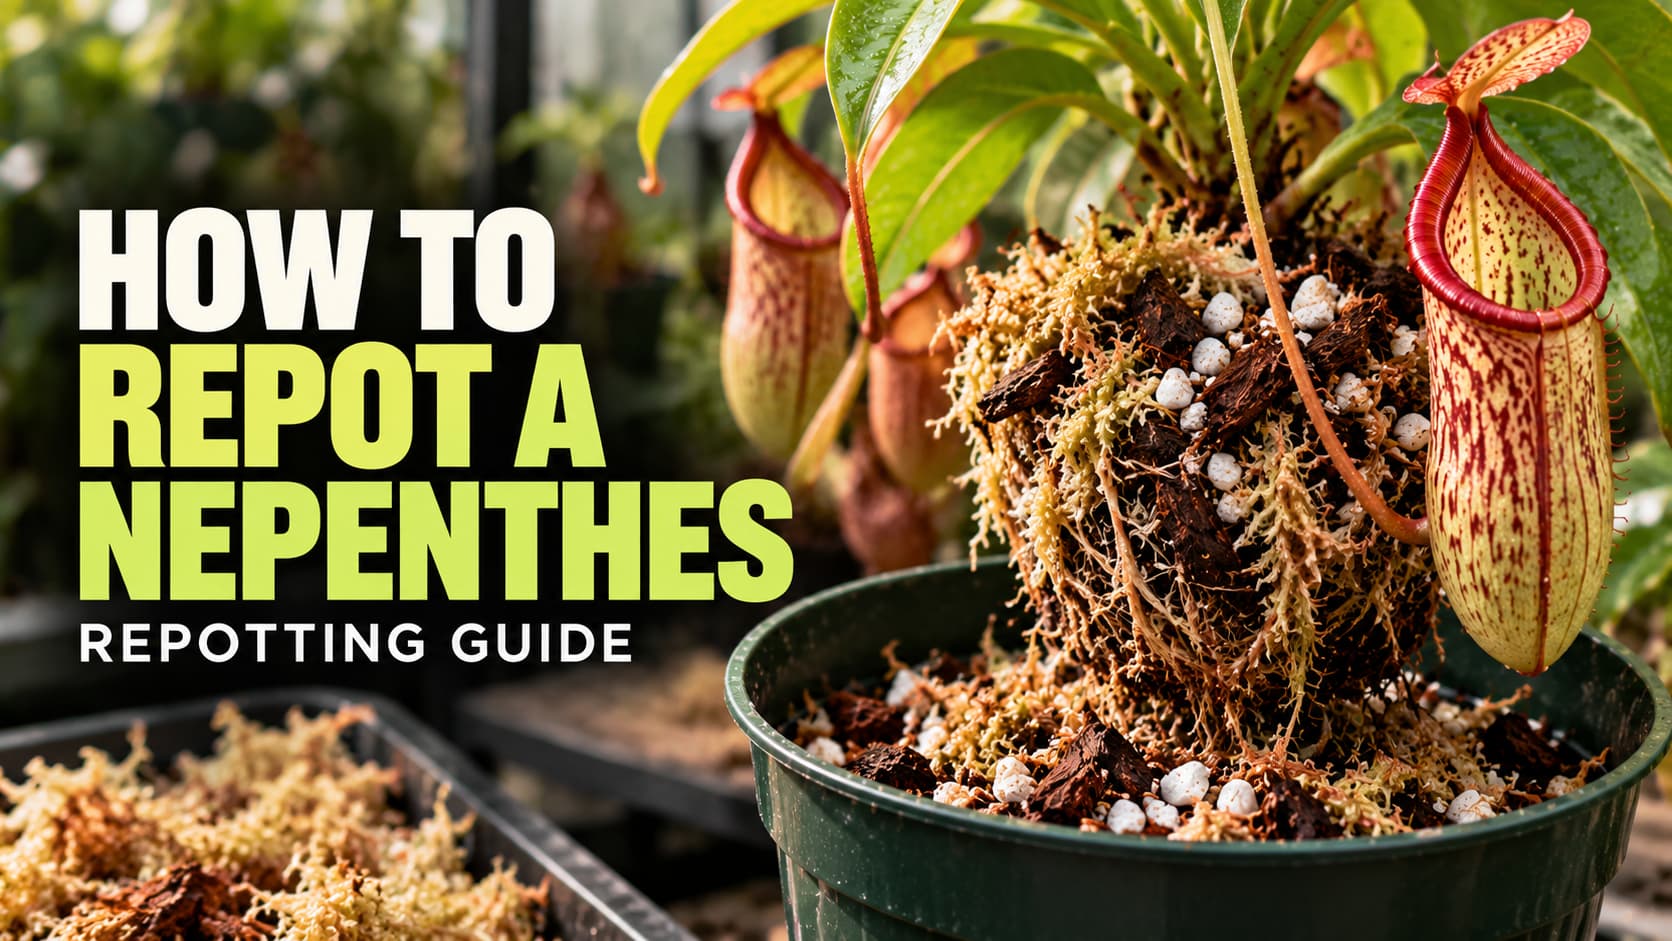
Knowing how to repot a Nepenthes can save a healthy plant from a poor growing medium, an undersized container, or a root zone that no longer drains the way it should. But repotting is not a routine ceremony that every pitcher plant needs on the same date each year.
Nepenthes have relatively fine roots, and established plants can react badly to unnecessary disturbance. The better approach is to repot when there is a clear reason, use an airy low nutrient medium, choose a container that is only moderately larger, disturb the root ball as little as practical, then give the plant stable conditions while it settles in.
This guide walks through the decision from start to finish, including when to repot, what pot to choose, how much old medium to remove, how to handle the roots, and what to do after the plant is back in its new container.
When Should You Repot a Nepenthes?
Not sure if it is time? Our repotting advisor walks through the signs that a plant has outgrown its pot.
The first question should not be “How long has it been?” It should be “What has changed?”
Sarracenia Northwest recommends repotting when the plant looks too large for its container or when the potting medium has broken down, become compacted, or stopped draining properly. Carnivero lists similar signs, including roots emerging from the drainage holes, an unstable plant, and a root filled pot that dries much faster than it used to. See Sarracenia Northwest and Carnivero for their detailed guidance.
That means a Nepenthes can sometimes stay in the same container for years without needing to be disturbed. A plant that is still stable, growing normally, and living in a medium that remains open and drains well may have no reason to be repotted simply because a certain number of months has passed.
On the other hand, a plant can outgrow a small pot surprisingly quickly. If the container tips easily, the root mass is becoming crowded, or water now moves through the pot differently, those observations are more useful than a calendar.
Common signs that it may be time
- Roots are emerging from the drainage holes and the plant is becoming crowded.
- The plant has become top heavy or unstable in the current pot.
- The substrate has broken down into a dense or mushy mass.
- Water no longer drains freely.
- The pot dries far faster than it used to because the root mass has filled much of the container.
- The plant has outgrown the container and the current pot no longer supports stable growth.
Should You Repot a Nepenthes on a Fixed Schedule?
Not necessarily.
Carnivero states that Nepenthes can thrive in the same pot for several years and should be repotted when practical signs appear, such as instability, roots protruding from the bottom, unusually fast drying, or a deteriorating medium. Sarracenia Northwest likewise advises against a fixed schedule and instead ties repotting to the condition of the plant and substrate.
This is especially important because repotting creates its own stress. Even a careful transfer can interrupt pitcher production for a while if roots are disturbed. Sarracenia Northwest notes that Nepenthes have relatively fine roots and recommends handling them gently, without removing potting material that is still firmly attached to healthy roots.
A good repotting decision is therefore conservative. Repot because you have identified a root zone or container problem, not because you feel the plant is overdue.
What Pot Should You Use for a Nepenthes?
The safest choice is usually a pot with good drainage and a sensible size for the current root system.
Carnivero recommends choosing a pot that is not excessively large and increasing size gradually. Oversized containers can hold more wet medium than the root system can use, which can slow drying and increase the chance of an overly wet root zone.
Plastic pots are a practical option because they are lightweight, durable, and easy to select with drainage holes already present. Glazed ceramic can also work when it is suitable for carnivorous plants and has adequate drainage. Carnivero advises avoiding porous terracotta or clay because of the risk of unwanted mineral contribution from the pot itself.
You do not need to buy a huge pot for a plant that may eventually become a long vine. Choose based on the size of the present root system, the amount of medium you can keep appropriately moist, and how stable the plant is in the container.
How much larger should the new pot be?
A modest increase is usually easier to manage than a dramatic jump.
Moving up by roughly one or two inches in diameter is a useful practical rule for many established plants, provided the new container still suits the size of the root system. Carnivero describes incremental increases as the plant grows rather than jumping straight into a very large container.
The exact size still depends on the plant. A large vining Nepenthes and a young compact specimen should not be treated as though they have the same root mass.
What Potting Mix Should You Use?
The new medium should be moisture retentive but airy, free draining, and low in nutrients.
For many growers, a simple mix of long fiber sphagnum and perlite is enough. Sarracenia Northwest recommends equal parts dried sphagnum and perlite for many commonly grown Nepenthes. Carnivero uses a more structured mix made from sphagnum, perlite, and leached coco chips. Both approaches are designed to hold moisture while maintaining air space around the roots.
Do not use ordinary garden soil or standard fertilized houseplant mix. Sarracenia Northwest explicitly warns against potting soil and compost because their nutrient and mineral content can be harmful to carnivorous plants.
For a deeper breakdown of ingredients and practical ratios, see Best Potting Mix for Nepenthes: Soil Ingredients and Ratios.
Should You Remove All the Old Soil?
No. That is one of the easiest ways to make a simple repot much more stressful than it needs to be.
Sarracenia Northwest recommends handling Nepenthes roots gently and avoiding unnecessary removal of substrate that is still firmly attached to healthy roots. Carnivero similarly advises shaking away some of the old medium without trying to scrape every particle from the root system.
There are situations where more of the old medium may need to be removed. For example, if the substrate has seriously broken down, become stagnant, or developed a problem that must be addressed, you may need to clean more thoroughly.
But for a routine size upgrade, the safest mental model is simple: move the root ball, do not rebuild the root ball.
How to Repot a Nepenthes Step by Step
1. Prepare everything first
Have the new pot, fresh growing medium, suitable water, a clean work surface, and any support stake ready before you remove the plant.
Use rainwater, distilled water, or reverse osmosis water according to your normal care routine. A dry work area and scattered supplies make it easier to damage the plant when you are trying to improvise.
2. Prepare the new pot
Confirm that the container has open drainage holes. Add enough fresh medium to create a stable base for the root ball.
The goal is not to fill the entire pot before the plant goes in. You want enough substrate underneath the existing root mass so the plant can sit at approximately the same depth as before.
3. Remove the Nepenthes gently
Tilt the old pot and support the plant near the base of the stem. Squeeze, tap, or gently wiggle the container to help release the root ball.
Do not yank hard on the stem. The pot should be loosened around the root mass so the plant can come free with minimal force. Carnivero specifically advises using the pot itself as the thing you loosen rather than using the plant stem as the main pulling point.
4. Inspect the root ball without destroying it
Look for a dense outer layer of roots, compacted medium, broken down material, and obvious problems around the container.
Nepenthes roots are often fine, dark, and somewhat scraggly, so appearance alone is not enough to diagnose root damage. Focus on the condition of the entire root zone and the moisture behavior of the old substrate.
If the plant simply needs a larger pot, preserve as much of the healthy root mass as possible. Sarracenia Northwest recommends handling the roots gently and keeping disturbance to a minimum.
5. Set the plant at the same depth
Place the root ball in the centre of the new pot. Aim for roughly the same planting depth the plant had before.
Do not bury the stem deeper simply because the new pot is taller. The goal is to support the plant without changing its basic planting position.
6. Fill the empty space with fresh medium
Add the new mix around the outside of the root ball. Work it gently into the gaps so the plant is supported evenly.
Use your fingers to guide larger pieces around the roots instead of pressing down aggressively. The final medium should hold the plant firmly enough that it does not wobble, while still remaining open and airy.
7. Water thoroughly
Once the Nepenthes is stable, water the new medium thoroughly and allow excess water to drain from the pot.
This settles the substrate around the roots and reveals whether water is actually moving through the new pot as expected. If water immediately pools on top or takes an unusually long time to leave the container, stop and investigate the medium rather than assuming more watering will solve it.
Should You Cut Nepenthes Roots When Repotting?
Usually, no.
Healthy Nepenthes roots are not something you need to trim just because they look thin, dark, or messy. Specialist guidance from Sarracenia Northwest emphasizes handling these fine roots gently and minimizing disturbance.
There can be exceptional situations where damaged tissue needs attention, but that is a different problem from routine repotting. If you are unsure whether what you see is normal Nepenthes root structure or genuine decay, focus on the condition of the surrounding medium, the plant’s recent growth, and the timeline of the decline before cutting anything.
Should You Stake a Nepenthes After Repotting?
If the plant has become tall or unstable, a stake can be useful.
Nepenthes are naturally vining plants, and larger specimens can become difficult to balance in a pot. Carnivero recommends using a sturdy support such as bamboo or another stable stake and securing the vine gently rather than forcing it into a new position.
Do not use staking as an excuse to disturb the roots again. If the plant is already secure, leave it alone.
If the vine has simply outgrown its space, staking is not your only option. You can cut it back and root the pieces as new plants; our guide on how to propagate Nepenthes from cuttings explains where to cut and how to plant them.
What Should You Do After Repotting?
This is where many growers become impatient.
After repotting, the best follow up is usually stability. Return the plant to a suitable growing location and avoid making several more major changes at the same time.
Sarracenia Northwest notes that some temporary slowing of growth after repotting is normal. Their advice is to return the plant to its usual growing conditions and let it become established instead of repeatedly changing its environment.
Do not respond to a temporary lack of pitchers by immediately adding a humidity dome, moving the plant to a new window, changing fertilizer, and repotting again. If the roots have just been disturbed, the plant may need time to resume normal development.
This matters especially for recently shipped plants. Carnivero recommends special acclimation care after shipping, repotting, or propagation because Nepenthes can take weeks to adjust to a new environment.
How Long Does a Nepenthes Take to Recover From Repotting?
There is no universal recovery period.
A lightly disturbed, established plant in a suitable environment may settle without dramatic symptoms. Another plant, especially one that was already stressed before repotting, may slow down more noticeably.
The useful thing is to judge the trend rather than a single day. Healthy new leaves, stable stems, and gradual resumption of pitcher development are more informative than expecting a new pitcher within a fixed number of days.
If the plant declines steadily after repotting, look at the root zone, moisture level, temperature, light, and airflow instead of assuming the act of repotting itself was the only problem.
What Growers Report
Repotting stories come up often on grower forums. These are single growers’ results in their own conditions, not rules, but they show how differently Nepenthes can react to the same job and how long the recovery can take.
- A grower repotting a root-bound N. bicalcarata about a year and a half after buying it found the roots packed so tightly that they had left imprints on the inside of the pot, which cracked as it was loosened. Because the mix was only about a year old, the grower moved the root ball as it was, judging that “untangling it would have just caused more of a transplant shock” (F R e N c H 3 z, Terraforums, June 2010)
- A grower in Hertfordshire, England, repotted a large N. alata for the first time after it outgrew its pot. The plant sulked straight away, and within a few days “all 11 of its pitchers had shrivelled up and died”. About six weeks later it was bouncing back, with its first new pitchers inflating (DaveC, Carnivorous Plants UK forum, April 2010)
- A grower in Oxfordshire, England, moved two garden center plants out of compost that had turned into a solid, sticky lump and into a more open mix of peat, perlite, orchid bark and live sphagnum. Almost a week later, the N. sanguinea, which went into a slightly bigger pot, “doesn’t appear to have noticed that anything has changed at all”, while the N. x ventrata, kept in its old pot with the new mix, began losing five of its older pitchers but still opened a new one (LoopyLee, Carnivorous Plants UK forum, April 2010)
- A grower who potted up a newly arrived N. x ‘Medusa’ about 18 inches (46 cm) tall saw the whole plant shrivel “dramatically about 12 hours after being potted up”. Moving it to the warmest, most humid growing house available and covering it with a bag like a cutting finally started a recovery, though the grower expected it to take a year or more to be fully healthy and pitchering again (SWAGnum, Terraforums, December 2013)
Our takeaway: the same job left one plant apparently untouched and cost another every pitcher it had, and a newly shipped plant came close to collapse within a day of being potted up. Moving the root ball intact, repotting only for a clear reason and giving the plant weeks or even months of stable conditions before judging the result is what these growers’ experiences support.
When Repotting Can Actually Make Things Worse
Repotting a healthy plant because you are bored
There is no horticultural prize for disturbing a stable root system. A healthy plant in a functioning medium can often be left alone.
Moving into a pot that is far too large
A huge container can hold wet medium for longer than the root system needs. Choose the next practical size rather than the final size you imagine the plant will eventually need.
Removing every piece of old medium
Routine repotting does not require perfectly bare roots. Excessive cleaning creates unnecessary disturbance.
Compressing the new substrate
A compact medium may hold water but lose the air spaces that make Nepenthes roots healthier.
Changing everything after repotting
Do not combine a repot, drastic lighting change, major humidity change, new fertilizer routine, and constant relocation unless there is a clear reason. Too many changes make it difficult to understand how the plant is responding.
Repotting a Nepenthes That Is Already Struggling
This is where the decision becomes more complicated.
If a Nepenthes is already losing leaves, staying wet for unusually long periods, producing smaller growth, or showing other signs of root zone trouble, repotting may be justified. But the goal should be to correct the root environment, not simply to refresh the soil.
Inspect the medium carefully. If it has collapsed into a dense mass, replace it with a suitable airy mix. If the problem is mainly that the plant is too large for the current pot, move it into a moderately larger container while preserving the root ball.
Afterward, resist the urge to keep changing the setup. A damaged root system needs time to rebuild.
How Repotting Connects to Watering, Light, and Humidity
Repotting is one part of a larger system.
A new pot changes the amount of medium around the roots. A new mix changes how quickly water moves through the container. A larger root system changes how quickly the plant uses that moisture. Light and temperature then influence how quickly the whole system dries.
That is why you should not copy the watering schedule you used before the repot and assume it will remain correct. Your new container may behave differently.
Our guide on How Much Light Does a Nepenthes Need? Indoor Grow Light Guide explains how light affects indoor growing conditions, while Does Nepenthes Need High Humidity? Indoor Humidity Guide covers humidity and enclosure questions.
FAQ: Repotting Nepenthes
How often should I repot a Nepenthes?
There is no universal schedule. Repot when the plant has outgrown the container, the medium has broken down, drainage has deteriorated, or another clear root zone problem has developed.
Should I move a Nepenthes into a much bigger pot?
Usually not. A moderately larger container is easier to manage because an oversized pot can hold excess moisture for longer.
Should I remove all the old medium from Nepenthes roots?
No. During routine repotting, preserve as much of the healthy root ball as practical. Specialist guidance specifically recommends minimizing root disturbance.
Can I use regular potting soil?
No. Avoid ordinary garden soil, compost, and fertilized houseplant mixes. Nepenthes need a low nutrient, airy growing medium.
Will repotting stop a Nepenthes from making pitchers?
It can temporarily slow pitcher development, especially when roots are disturbed. That is one reason to repot only when there is a clear need and then keep the environment stable.
Should I put my newly repotted Nepenthes in a humidity dome?
Not automatically. Some newly shipped or sensitive plants may benefit from controlled acclimation, but a stable established plant does not need a dome simply because it has been repotted.
What should I do if my Nepenthes looks worse after repotting?
Check whether the new medium is staying too wet, whether the plant received a major environmental change, and whether the root system was heavily disturbed. Keep conditions stable while you evaluate the trend.
The Bottom Line
Repotting a Nepenthes is mostly an exercise in restraint.
Wait for a real reason. Choose a container that is only moderately larger. Use an airy low nutrient medium. Keep healthy roots intact. Water thoroughly after the transfer, let the pot drain, and then give the plant enough time to settle.
The goal is not to create a perfect looking pot on repotting day. The goal is to create a root environment that works quietly for months afterward.
When the medium stays open, moisture remains predictable, and the plant is not constantly disturbed, your Nepenthes has a much better chance to show you what healthy growth looks like.
Sources & Further Reading
- Carnivero: How to Repot a Nepenthes
- Carnivero: Nepenthes Care Guide
- Sarracenia Northwest: How to Grow Nepenthes
- Sarracenia Northwest: Q and A 162, Troubleshooting a Pitcherless Nepenthes
- Carnivero: Bag Acclimation
Final articles are editorially reviewed and factual claims are checked against cited sources.

5 Comments